One of the awesome new features introduced in CRM 2016 is Word Templates, which gives you a whole new way to get usable data from CRM without having to write a traditional SQL or FetchXML report – you can even generate the reports in a workflow! As cool as that is, a current limitation is that your generated document always ends up with the same name as your template. Giving a generated Word document a new name should be simple, and now it is. By using the ‘Rename an Attachment’ activity, you can generate a Word doc and give it any name you want, even using dynamic values. In my case, I’m creating an Account Summary document and changing the filename to include when it was created. Here’s a step-by-step guide on how to do it yourself.
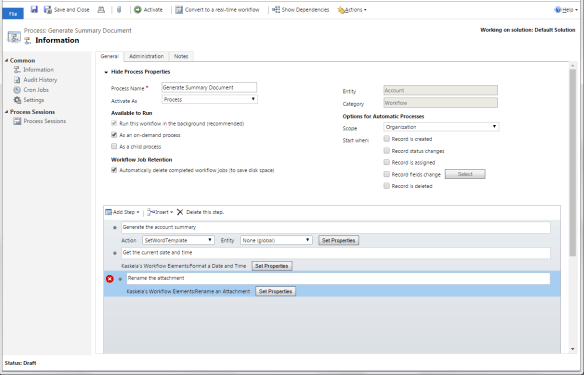
Create the workflow and generate the document
In my example, this is a workflow that runs on the account record, On Demand. A more practical example would run when certain fields change but this is easier to demonstrate. To create the document, click on Add Step, Perform Action, then select SetWordTemplate under Action.
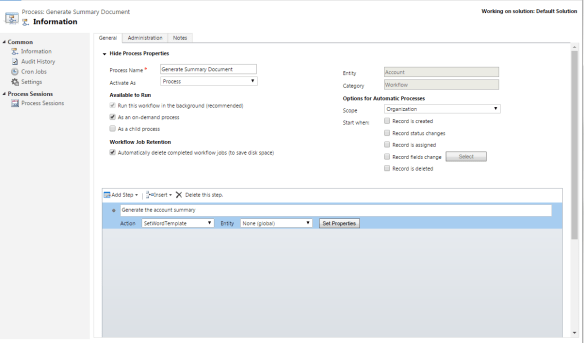
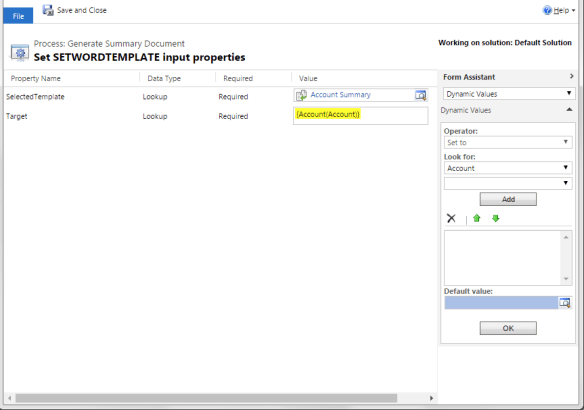
Click Set Properties to fill in the necessary details to create the document. Select the template to use (Account Summary) and the Target entity (the main workflow entity). Save and close the details.
IMPORTANT: The rename activity step will only look for documents on the main workflow entity so the Target entity has to be the account.
Build the new file name
This step is optional and depends on your scenario, but in my case I want to name the report “Account Summary – {current date and time}.docx”, where {current date and time} is expressed “yyyyMMdd.HHmm”. Can’t do this out of the box but you can with another included activity Format a Date and Time. Click Add Step, Kaskela’s Workflow Elements, Format a Date and Time (“Date – Convert to Custom Text” with v0.9.4).
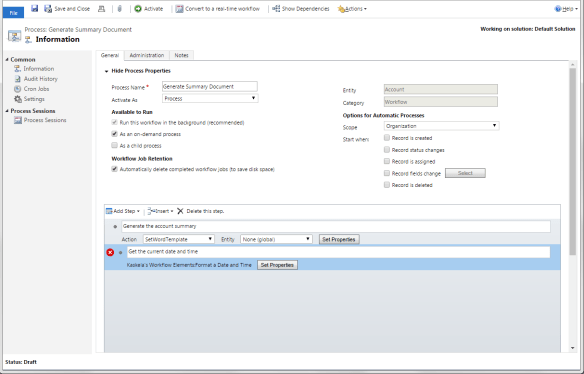
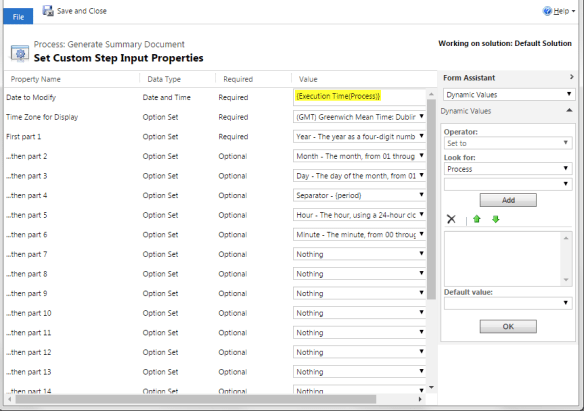
Give the step a descriptive name (Get the current date and time), then click Set Properties to define how you want the date formatted. In my case, I want the workflow execution time (now), in GMT, then the rest of the parts of the date text.
Rename the attachment
Now we have everything we need to rename the file. Click Add Step, Kaskela’s Workflow Elements, Rename an Attachment (“Documents – Rename Attachment” with v0.9.4). Then click Set Properties to fill in the details.
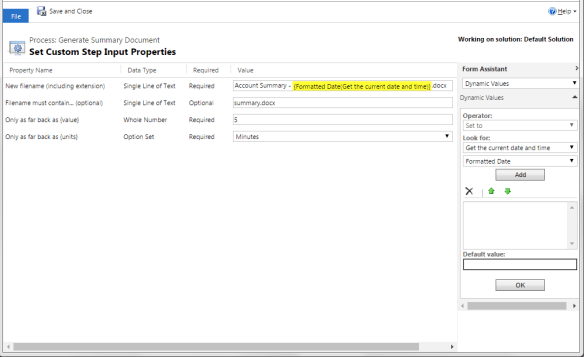
There are only a few fields to set – first is the new file name. I went combined the literal for the name of the original report with my formatted date text, then the extension. To do that, click inside the Value field and to the right under Look for, select the format activity name from the last step (Get the current date and time), then in the next drop down select Formatted Date, click Add and Ok. This will add the dynamic field to the text and just type around it.
The next field – Filename must contain… – is optional and allows you to get more specific with the file to look for. Since I know I want the account summary word doc coming out of the workflow, I put in ‘summary .docx’. The next two fields are for how far back do you want to do to find a doc matching that description. Since the document I want to change was just created, I’ll leave it at the default of 5 minutes. Click Save and Close, then Activate your workflow.
Admire the results
Run your workflow just to verify and you should see a freshly created document, named however you want.

