The biggest workflow deficiency in Dynamics has always been the inability to schedule workflows. Weekly status reports or reminder emails are just two examples, but there are countless other uses for recurring workflows, and it’s staggering that Microsoft hasn’t added the feature to Dynamics.
There are a lot of workarounds that have been built with varying levels of success, but they’re really just workarounds and not proper solutions. If you’re a Dynamics (Online) customer, now you have something that can finally fill that gap – Flow. Flow is hyper-reliable, basically free, and doesn’t use Dynamics resources like Waiting workflows do.
The Flow connectors for Dynamics are relatively simple and only let you take a few actions (Query, Create, Retrieve, Update, Delete), but we’re able use these creatively to run workflows in Dynamics, either on a specific record or on the system itself. Workflow Elements (v2.0.0) has a few new features which will help you quickly set up your recurring workflows.
The Concept: Running a Workflow in Dynamics
Flow doesn’t have an action available to let you run a workflow directly from Flow, but we can leverage the Create Record action.
We’ll use Flow to create a “Workflow Elements Task” record in Dynamics, and we will trigger the new workflow to run on create of the Workflow Elements Task. If we want to run the workflow on a specific Contact record for example, the W.E. Task will be created with a Contact as the Regarding record, and the workflow initiates a child workflow on the Contact record.
Example: Send a Reminder Email Workflow on Invoices 14 Days Overdue
This is a common scenario – you create an invoice for a customer and want to give them a gentle reminder if they’ve missed the payment deadline.
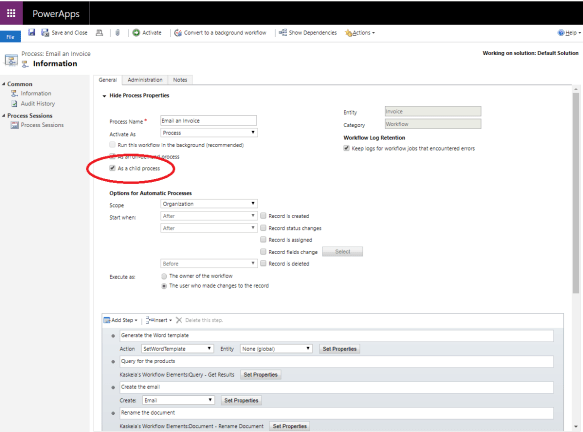
Create the Invoice Reminder Worklfow
This workflow will run on the Invoice record and will be responsible for sending the email reminder to the customer. Maybe the email will contain a table of all the products the person bought, that would be neat. The key thing here is to set the workflow to run As a Child Process.
My preference is to have these synchronous (that is, not Background processes). I can hear you screaming now “It’s not good for performance!” The truth is, it’s not that they are bad for performance, just that the caller needs to wait until they’re finished to continue their work. If we were the sitting there running the workflows manually then we would have to wait for it to run, but since Flow is doing it, it doesn’t matter if it takes a few seconds longer.
When youre satisfied with the workflow, test it and Activate it.
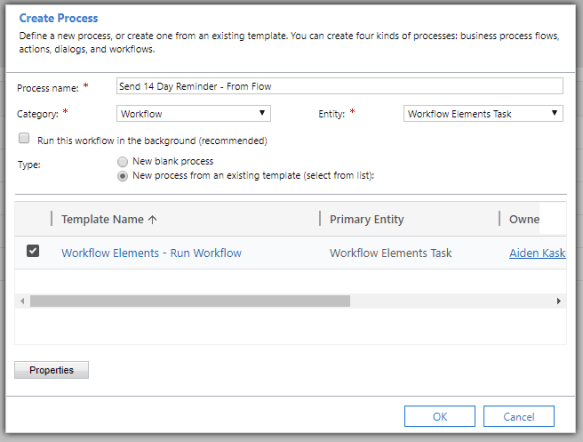
Create the Workflow Elements Task Workflow
This workflow will be triggered by the Flow, and will kick off the invoice workflow created in the last step.
When you create this workflow, give it a distinct name, select the Entity “Workflow Elements Task”, and “New process from an existing template”. You should see a new template in the list called “Workflow Elements – Run Workflow” – select it and hit OK.
You should use the default settings here – run when the record is created.
In the workflow, there will be a Check condition which checks the subject of the created task. This is key to letting Flow run different workflows on different schedules. Click on the Check condition
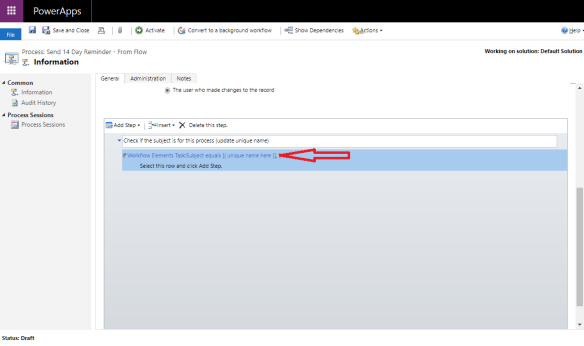
and in your criteria, change the subject to something distinct for this process “Send 14 Invoice Reminder”. The text you use here will be important later so you should put it in notepad. Since the Invoice will be the regarding record, you can also add any other criteria you’d put for the invoice, like making sure it’s not already paid. This can also be handled in the Flow query but I’m not accounting for it in this example.
After you set your conditions, save and close this form.

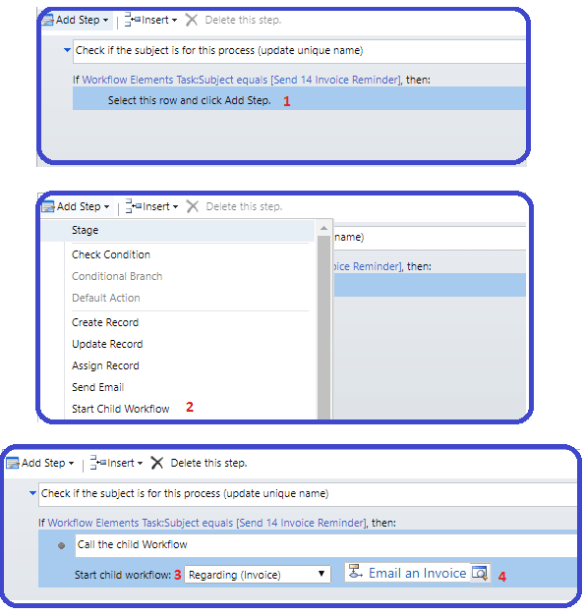
Inside the condition check, you will add the actions to kick off the “Email an Invoice” workflow as a child workflow. First, select the row inside your condition so the workflow only runs if that condition is True (Step #1)
Select Add Step, then Start Child Workflow (Step #2). You will see a new step added to the workflow.
Where is says ‘Start Child Workflow:’, since the workflow we want to run is the Invoice regarding the task, select “Regarding (Invoice)” (Step #3). When you select the invoice, you will see new workflows available in the workflow lookup. Select the workflow created from the last step, ‘Email an Invoice’ (Step #4).
With your workflow complete, Activate it and that’s everything on the Dynamics side of things. Now, any time a Workflow Elements Task is created regarding an invoice, with that specific subject, the invoice workflow will run.
Schedule Your Flow
Switch over to Flow from the app waffle, or go to flow.microsoft.com. The specific buttons to press will change, but you want to create a new workflow from blank.
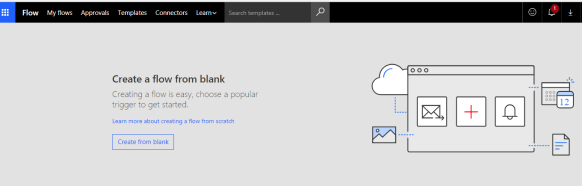
Flow consist of two main parts – the trigger and the action. The trigger is what makes the Flow run, and the action is what it does.
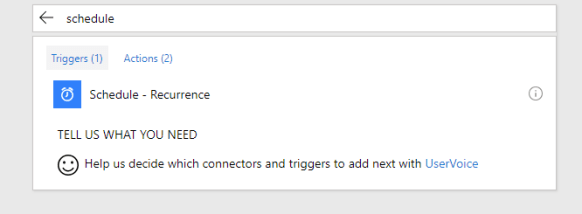
Since our new Flow is running nightly, search for Schedule and select “Schedule – Recurrence”
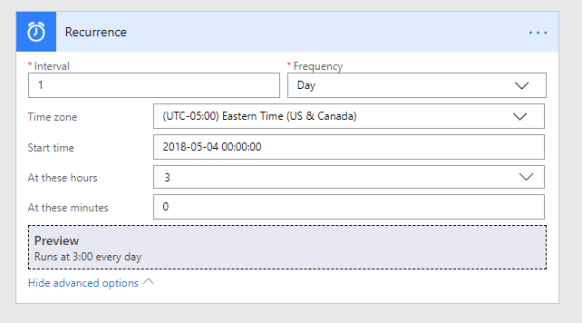
When you select the Recurrence option, you’ll be able to configure the timing of your Flow. In this example, I have it set to run once a day at 3am (Eastern US). The scheduler is incredibly powerful and allows you to make really specific recurrences, but I’ll write more on that another time.
Query for Invoices
After you set your schedule, we need to query for the Invoices that are 14 days overdue. To do that, select New Step, then Add an Action. Search for Dynamics, and select “Dynamics 365 – List Records”. After you select it, you’ll see a screen like this:
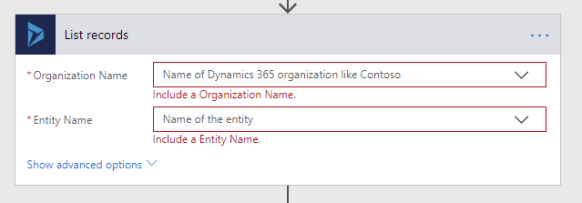
Under Organization Name, you’ll see your eligible Dynamics environments and you should select the one where you configured the workflow. Under Entity Name, select “Invoices”. If we ran it as is we would get back all invoices. To filter down the invoices, to those due 14 days ago, expand the Advanced options so you see a screen like this:

The filtering isn’t exactly intuitive, but there’s documentation available to help. It’s using the same filters that you would use on the WebAPI endpoint, so there are basic criteria filters available here and the advanced functions here.
When we set our filter query, we want it to limit to records with a due date of 14 days ago. To do that, we need to call the WebAPI Function “Microsoft.Dynamics.CRM.On”, and tell it the property (duedate) and value to check (14 days ago).
To do this, I’ll fill in all the text except for the dynamic date:
Microsoft.Dynamics.CRM.On(PropertyName=’duedate’, PropertyValue=”)
Put your cursor in the empty quotes next to PropertyValue and select Add Dynamic Content. Select the Expression tab and build the expression for 14 days ago:
addDays(utcNow(), -14)

Select OK and your filter should include the dynamics value now:

TIMEZONE NOTE: Since I’m in the Eastern US time zone and selected utcNow as filter date, I need to be aware that UTC and ET may be on different days based on time zone. If I run it at 11pm ET, from my perspective, Flow will be subtracting 14 days from tomorrow, instead of ‘today’. To compensate for this, either run in at a time where the day of your timezone matches the day in UTC, or change the number of days from -14 to -13 (or -15 depending on where you live)
Loop Through Each Invoice
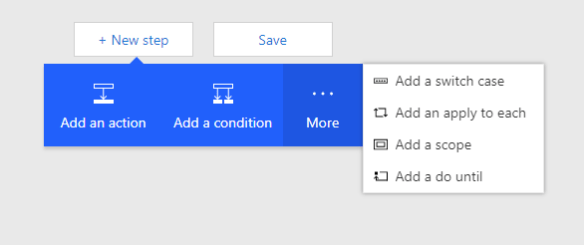
In the query, we’ve retrieved N records and we want to run the workflow on each individually. To do that, add a New Step and instead of clicking Action, click More then Add an Apply to Each. This will let you work with each result independently.
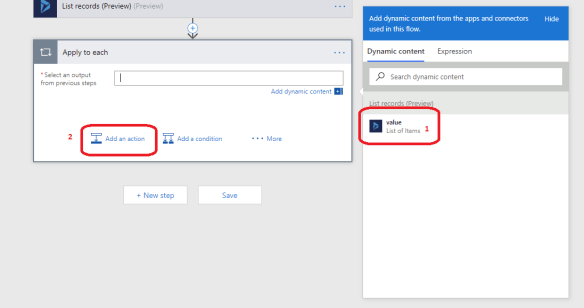
In the new Apply to Each window, select “value” from the Dynamic Content window (step #1), to indicate you’re looping for each result in the query. Then, select Add an Action (step #2) to perform an action.
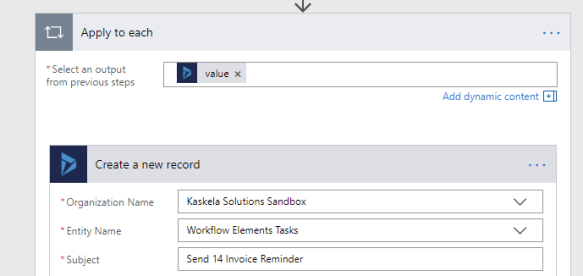
When choosing your new action, search for “Dynamics” and select “Dynamics 365 – Create a new record”. You’ll see another screen similar to the query screen, where we describe what we’re creating.
Under Organization Name, you’ll see your eligible Dynamics environments and you should select the one where you configured the workflow. Under Entity Name, select “Workflow Elements Tasks”. In Subject, enter the name from your Check condition in Dynamics (I used “Send 14 Invoice Reminder”).
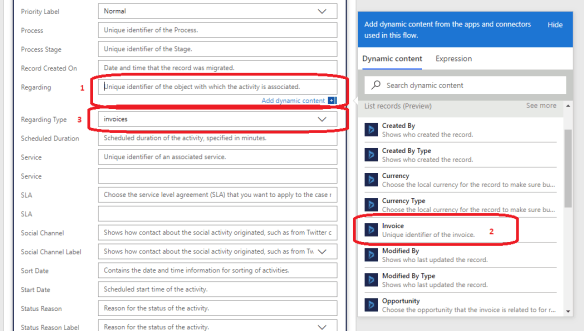
You also need to set the regarding object, so expand the Advanced Options and scroll down to Regarding. Put your cursor in Regarding (step #1) and look at the dynamics content area to find Invoice (step #2) and select that. Finally, in Regarding Type, select ‘Invoices’ as the type of record we’re using in the regarding field.
Test the Flow
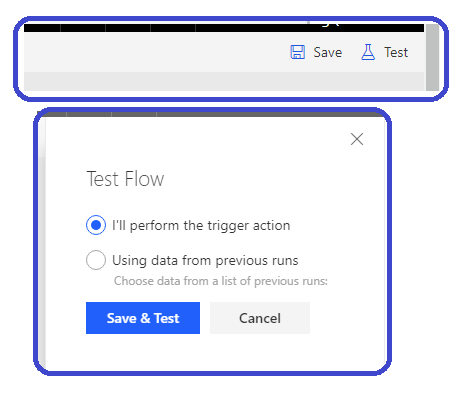
In the top right, click Save to persist all your changes, then Test to try your Flow. Click “I’ll perform the trigger action”, then Save & Test.
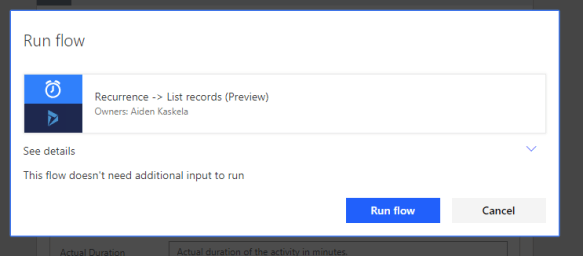
In the next popup, click Run Flow
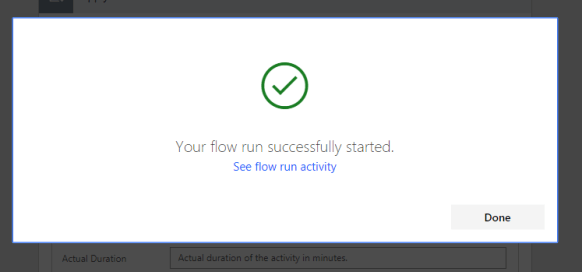
And you should see a success message with a link to see the run activity – click the link.
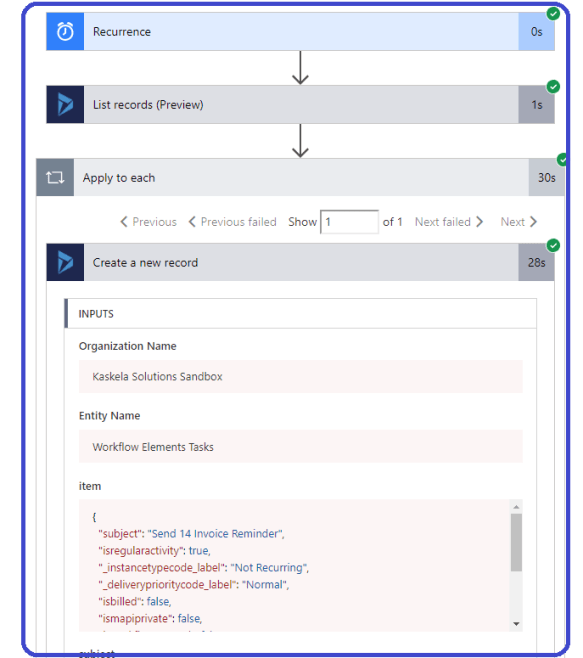
If you drill into the workflow details you can see details about that specific run, including what the query was, how many records were returned, and the results of your create on each of those records.
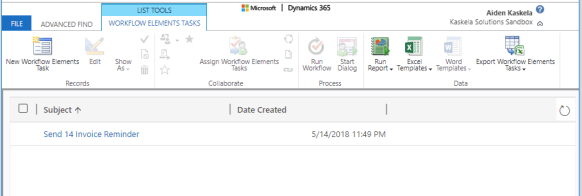
Checking your Work
Back in Dynamics, you should see a new Workflow Elements Task record for each invoice due 14 days ago
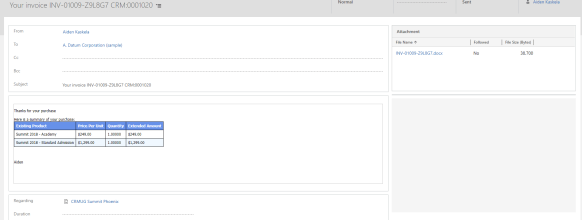
And when you drill into that task’s invoice, you’ll see an email to the customer about their purchase
Conclusion
Workflow Elements is a pretty powerful tool on its own, but when you add Flow it goes to another level. Flow’s advanced scheduling and reliability should make is a key tool in every Administrator’s toolbox. A few real world uses I’ve seen for it (with Workflow Elements):
- Email an instructor a class roster the morning of a class.
- Send a weekly email to the board including key metrics from Dynamics
- When members are due for renewal, email them a month ahead are remind them all the benefits of being a member.
Special thank you to Mr. Leon Tribe who introduced this concept to me.
